This will be a series of toutorials documenting connection and communication with an ESP8266 through the Azure IoT Hub. This first toutorial will cover how to set up an MQTT connection between your ESP8266 and Azure.
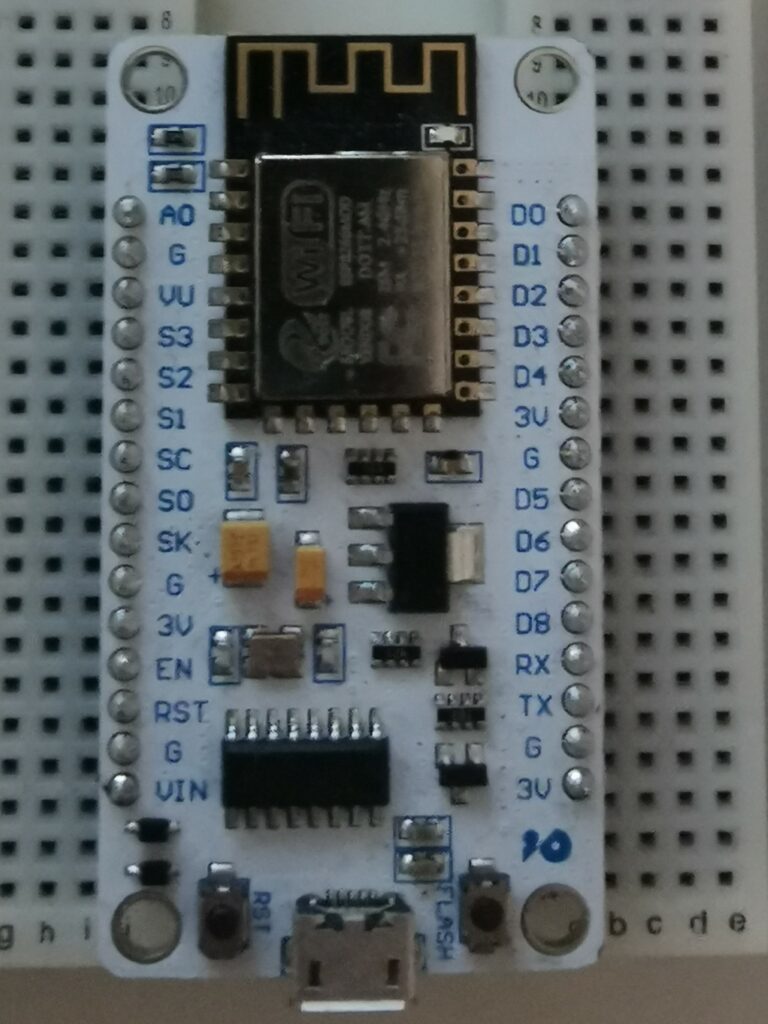
Hardware
For this demo, I use the Velleman NODEMCU V2 LUA BASED ESP8266. I can’t confirm that all the steps are similar for other boards.

Software
You will need the Arduino IDE and the Azure IoT Device Explorer. You will also need to register to the Microsoft Azure portal. In this toutorial we are using a free subscription.
Setting up your Azure IoT Hub
First you will need to create an IoT Hub
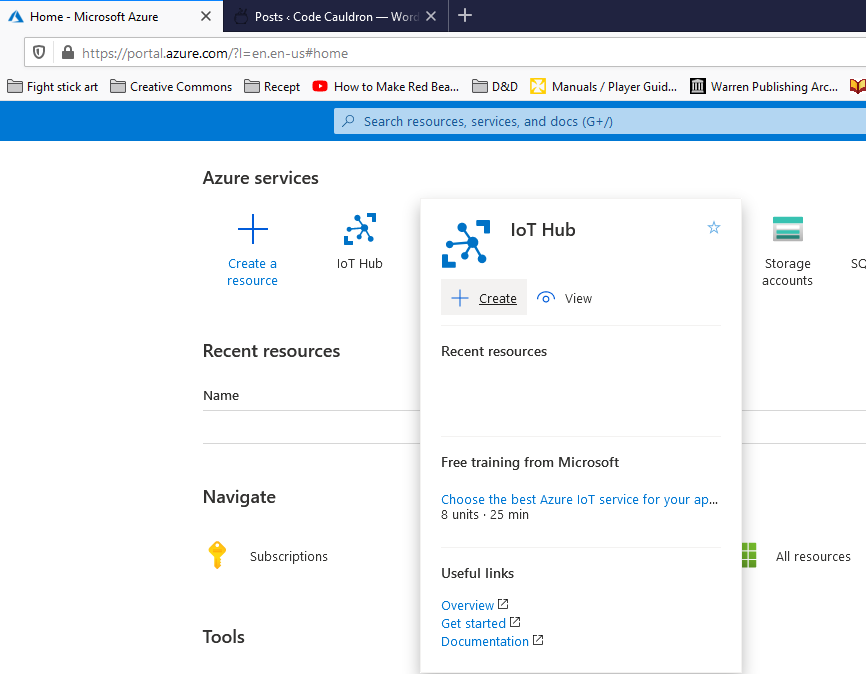
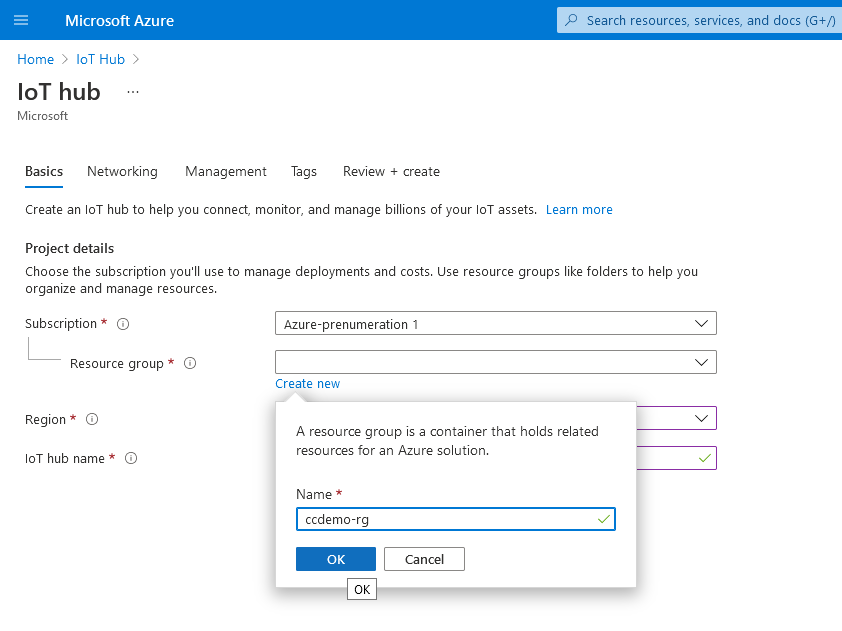
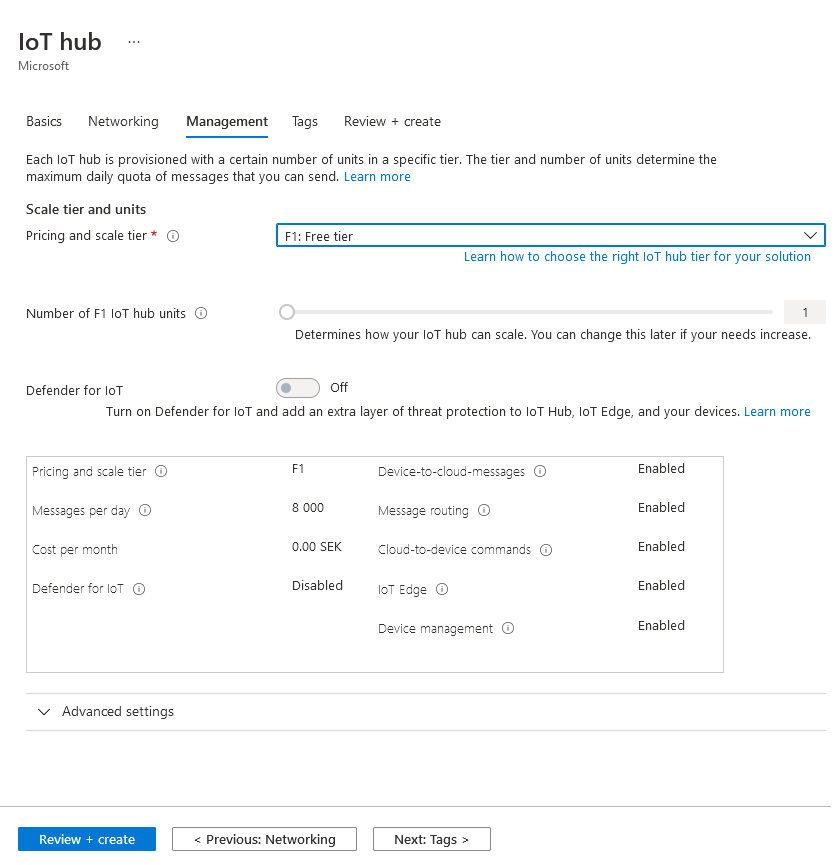
Then, enter your newly created IoT Hub for configuration. Fill in your subscription, create a new resource and then go to the Management-tab to choose a Pricing and scale tier. We choose the F1: Free tier.

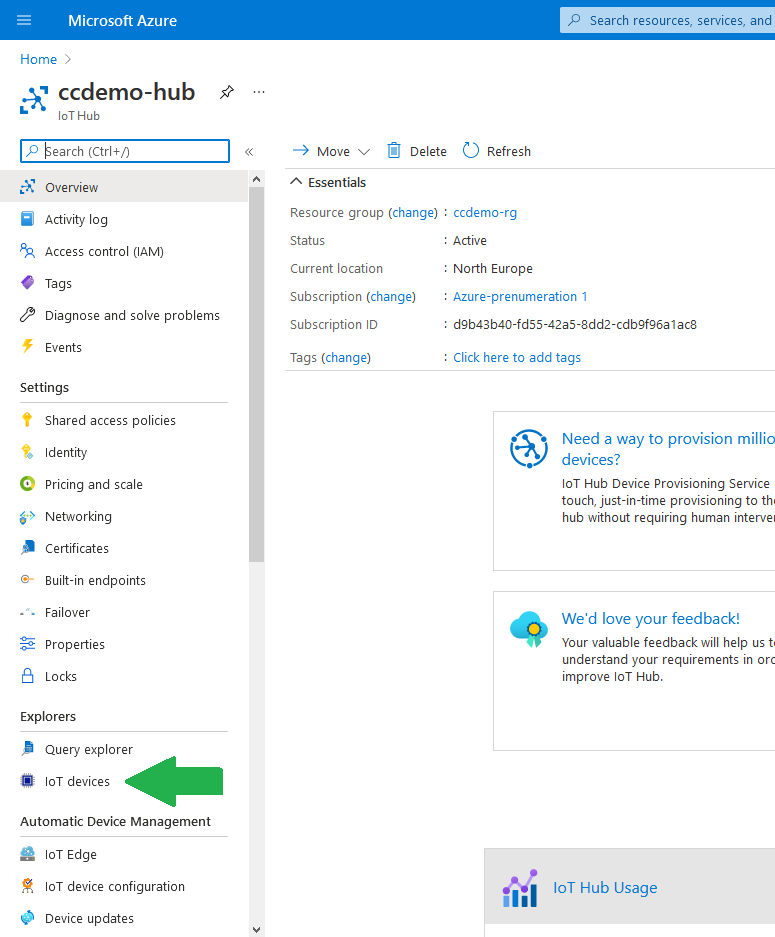
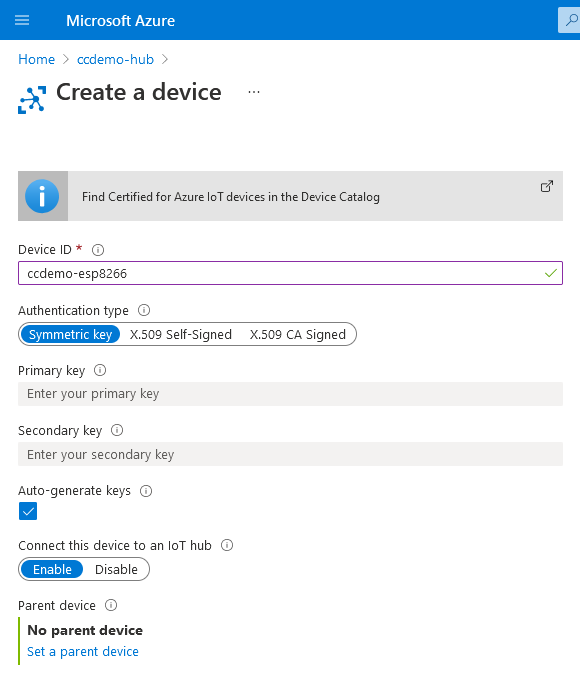
Enter the IoT Hub you just created and find IoT Devices in the left menu. You will then be able to add a new device.
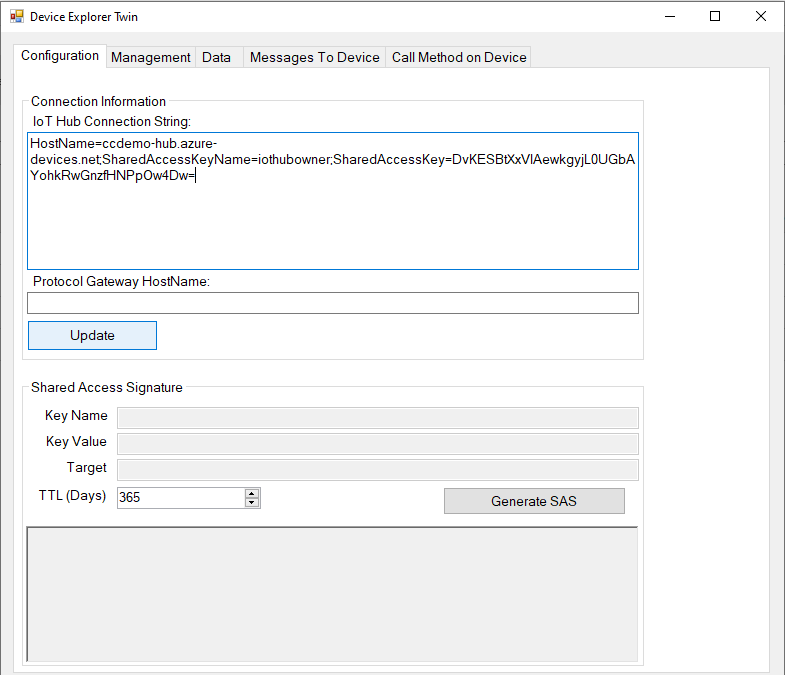
When you have created a device, navigate to Shared access policies where you copy the connection string for the iothubowner to the clipboard.

Now it’s time to open the Device Explorer. Here you should paste the connection string and press Update.
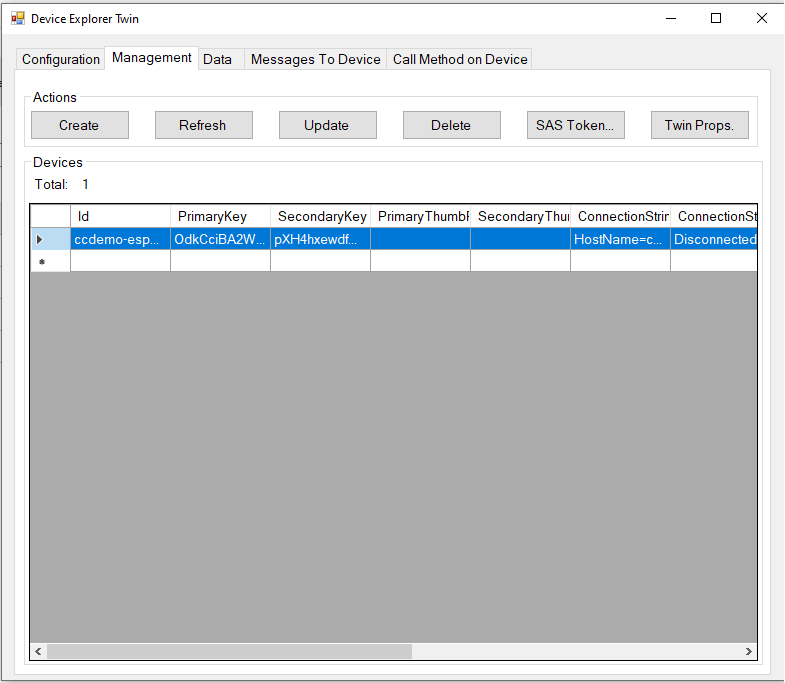
Then, go to the Management-tab and the device that you created within the IoT Hub should appear. Press the button SAS Token… and set the field TTL (Days) to however long you want the token to be active. Then choose Generate to get your token.
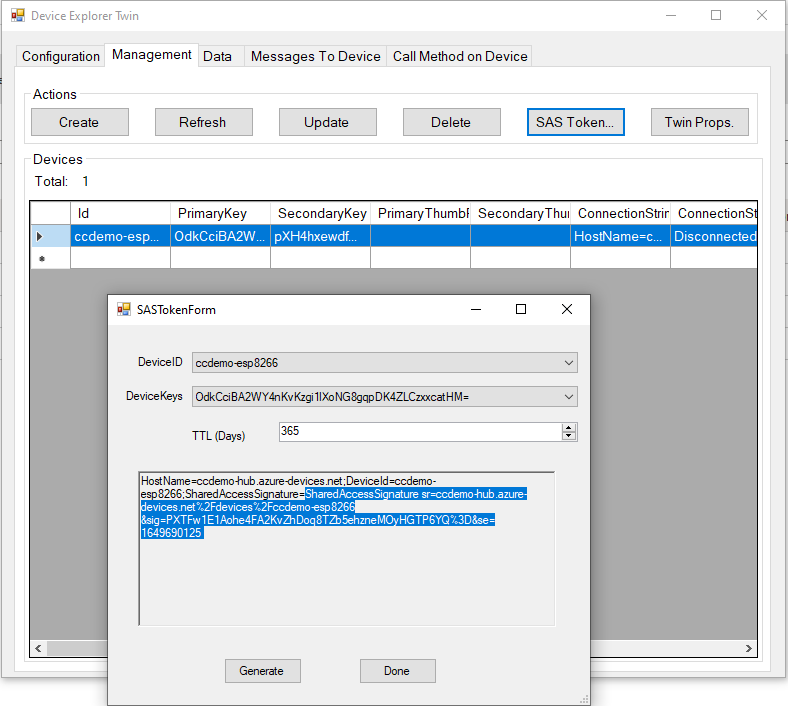
Now copy the part of the string marked in the image. Put this somewhere handy, because we are going to use it in our code.
Set up the ESP8266
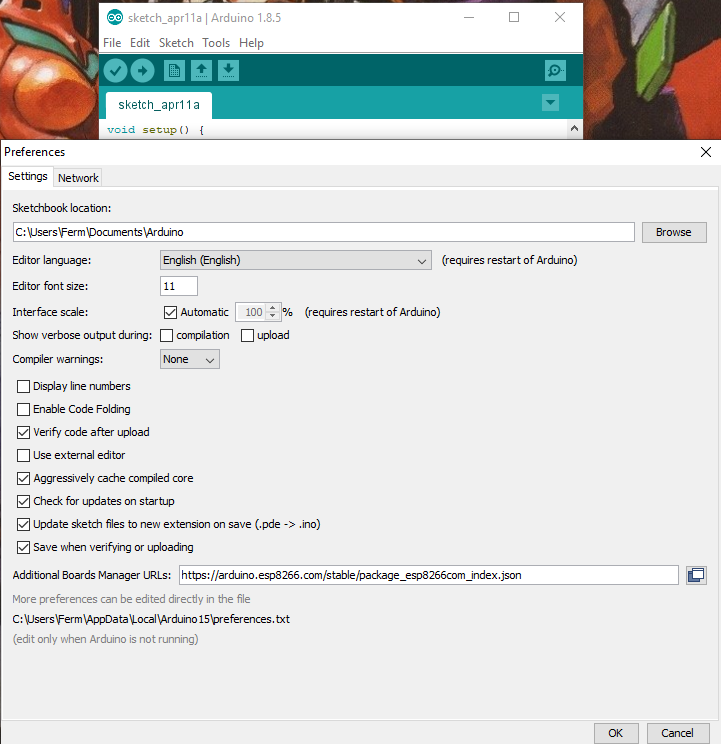
Now enter the Arduino IDE. Here you will first have to go to Preferences and add this link to Additional Boards Manager URL:s as shown in the image.
https://arduino.esp8266.com/stable/package_esp8266com_index.json
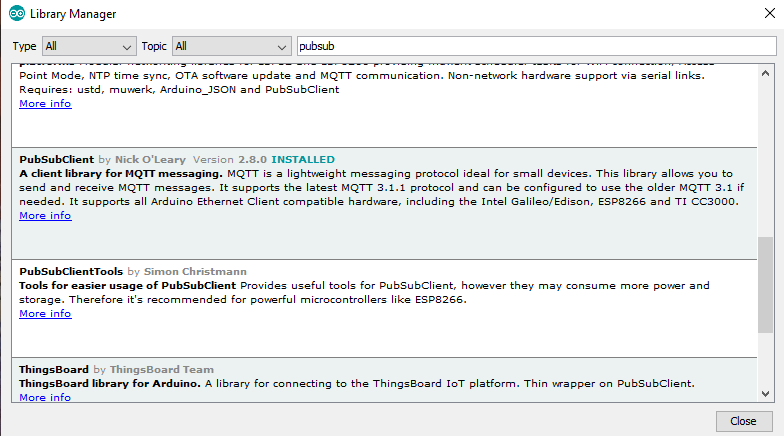
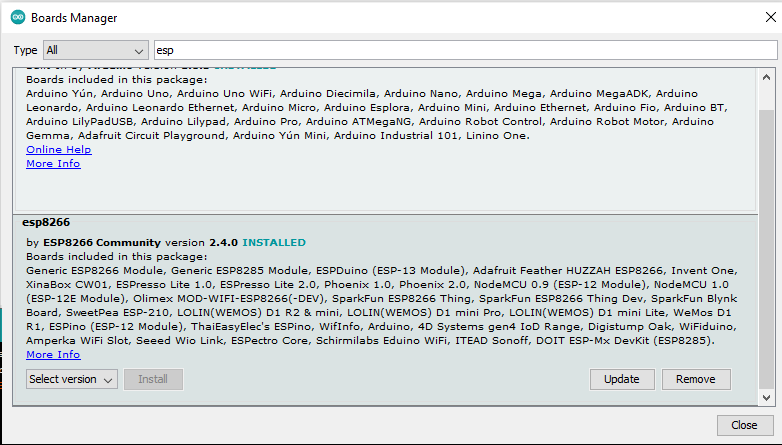
You then have to go to the Library Manager where you will search for the PubSubClient and install. Then go to the Board Manager and look for the esp8266 board. For this to work you’ll have to install version 2.4.0. I don’t know what happened in later versions, but I haven’t been able to establish an MQTT connection with them.
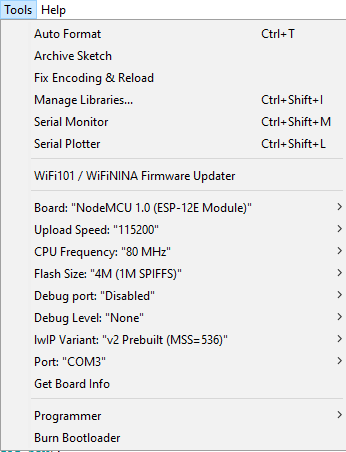
When you have installed the board, go to the Tools-menu and make sure to select the “NodeMCU 1.0 (ESP-12E Module”. Also make sure everything is in order for uploading code to the ESP8266 board.
Code
Now it’s time to look at some code. This is what we should start with. Make these includes and write the variables for connecting to your wifi and the IoT Hub. The “deviceSAS” is the string you copied earlier from the Device Explorer.
#include <ESP8266WiFi.h>
#include <PubSubClient.h>

const char* ssid = "<yourWifiName>"; //Wifi SSID
const char* password = "<yourWifiPassword>"; //WIFI password
const char* mqtt_server = "<yourIoTHubName>.azure-devices.net"; //MQTT Broker address
const int mqtt_port = 8883; //MQTT broker port
const char* deviceName = "<yourIoTDeviceName>";
const char* deviceSAS = "<yourDeviceSAS>";
Then instantiate your included libraries as below.
WiFiClientSecure espClient;
PubSubClient client(espClient);
Write this method for connecting the board to your wifi.
void setup_wifi() {
  delay(10);

  Serial.println();
  Serial.print("Connecting to ");
  Serial.println(ssid);
  WiFi.mode(WIFI_STA);
  WiFi.begin(ssid, password);

  while (WiFi.status() != WL_CONNECTED) {
    delay(500);
    Serial.print(".");
  }

  randomSeed(micros());

  Serial.println("");
  Serial.println("WiFi connected");
  Serial.println("IP address: ");
  Serial.println(WiFi.localIP());
}
Then write this method for making the MQTT connection.
void connect() {
  // Loop until we're reconnected
  while (!client.connected()) {
    Serial.print("Attempting MQTT connection...");
    String hubUserString=mqtt_server;
    hubUserString+="/";
    hubUserString+=deviceName;

    // Create a random client ID
    String clientId = "ESP8266Client-";
    clientId += String(random(0xffff), HEX);
    // Attempt to connect
    if (client.connect(deviceName, hubUserString.c_str(), deviceSAS)) {
      Serial.println("Connected!");
    } else {
      Serial.print("failed, rc=");
      Serial.print(client.state());
      Serial.println(" try again in 5 seconds");
      // Wait 5 seconds before retrying
      delay(5000);
    }
  }
}
Then in your setup() method, run your wifi setup method and pass the mqtt_server and mqtt_port to your wifi client.
void setup() {
  Serial.begin(115200);
  setup_wifi();
  client.setServer(mqtt_server, mqtt_port);
}
In the loop() method, write this condition so that connect() will be called as long as you’re not connected. Also call the loop() method in the PubSubClient.
void loop() {
if (!client.connected()) {
connect();
}
client.loop();
delay(5000);
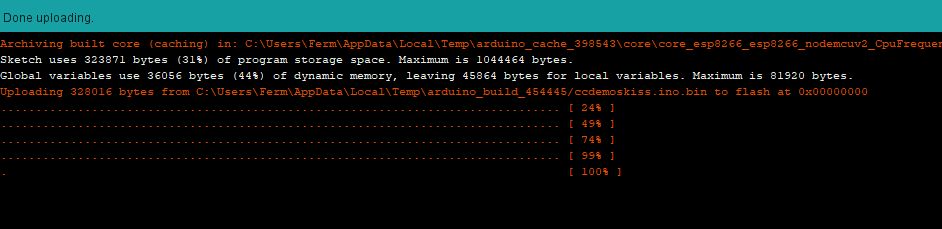
}That is all. Now, compile and upload this code to the ESP8266 board.
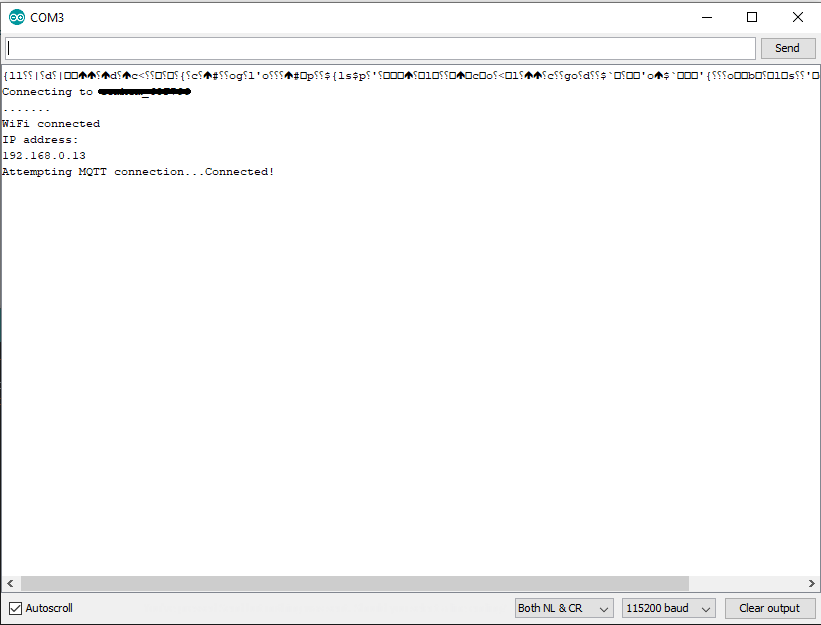
Now, open the Serial Monitor and press the Reset button (RST) located on your ESP8266 board. Some jibberish may be printed at the beginning, but if your baud rate is set as in the image (115200) — proper text will soon appear like this.
That’s all for this time!
I’ll get back later to make a follow-up on how to send messages between the Azure IoT hub and the ESP8266 board. Feel free to leave comments if you find errors or encounter problems!
This is actually the best and easiest manual to connect the NodeMCU with Azure and it worked well.
The obstacle at the moment is to send the payload to the Cloud. Do you have an example for that because with the following code Azure Cloud only receive failed messages:
char* sensorPayload = “{\”TableName\”:\”isalive01\”,\”PartitionKey\”:\”SM\”,\”RowKey\”:5526261,\”device\”:\”lightbarrier\”,\”LocalTimeStamp\”:\”2021-07-17:T12:12\”}”;
char* mqtt_topic = “devices/IsAlive_NodeMCU/messages/events/”;
void loop(){
if(WiFi.isConnected())
{
if (!client.connected()) {
connect();
}
client.loop();
if (client.connected())
{
client.publish(mqtt_topic , sensorPayload);
}
}
else
{
//reConnectWiFi();
}
delay(60000);
}
Thank you:)
Hi, sorry for the late answer. I’ve actually tried something similar and I get successful messages when I check the Data-tab in the Device Explorer. So I’m not sure what goes wrong in your case. Here is my full code:
#include
#include
const char* ssid = “”; //Wifi SSID
const char* password = “”; //WIFI password
const char* mqtt_server = “”; //MQTT Broker address
const int mqtt_port = ; //MQTT broker port
const char* deviceName = “ccdemo-esp8266”;
const char* deviceSAS = “”;
WiFiClientSecure espClient;
PubSubClient client(espClient);
void setup_wifi() {
delay(10);
Serial.println();
Serial.print(“Connecting to “);
Serial.println(ssid);
WiFi.mode(WIFI_STA);
WiFi.begin(ssid, password);
while (WiFi.status() != WL_CONNECTED) {
delay(500);
Serial.print(“.”);
}
randomSeed(micros());
Serial.println(“”);
Serial.println(“WiFi connected”);
Serial.println(“IP address: “);
Serial.println(WiFi.localIP());
}
void connect() {
// Loop until we’re reconnected
while (!client.connected()) {
Serial.print(“Attempting MQTT connection…”);
String hubUserString=mqtt_server;
hubUserString+=”/”;
hubUserString+=deviceName;
// Create a random client ID
String clientId = “ESP8266Client-“;
clientId += String(random(0xffff), HEX);
// Attempt to connect
if (client.connect(deviceName, hubUserString.c_str(), deviceSAS)) {
Serial.println(“Connected!”);
String subscribestring=”devices/”;
subscribestring+=deviceName;
subscribestring+=”/messages/devicebound/#”;
client.subscribe(subscribestring.c_str());
} else {
Serial.print(“failed, rc=”);
Serial.print(client.state());
Serial.println(” try again in 5 seconds”);
// Wait 5 seconds before retrying
delay(5000);
}
}
}
void callback(char* topic, byte* payload, unsigned int length) {
Serial.print(“Message arrived [“);
Serial.print(topic);
Serial.print(“]: “);
char message[length];
for (int i=0; i< length; i++){ message[i] = (char)payload[i]; } Serial.println(message); } void setup() { Serial.begin(115200); setup_wifi(); client.setServer(mqtt_server, mqtt_port); client.setCallback(callback); } void loop() { if (!client.connected()) { connect(); } char* payload = "Test!"; client.publish("devices/ccdemo-esp8266/messages/events/", payload); client.loop(); delay(5000); }
how to download device twin explorer